


Building an epaper laptop: The monitor
2nd July 2025 - Epaper laptop , Series , Hardware , Linux
 The most distinct part of making an epaper laptop is obviously the screen. And picking a screen for this project was always going to be one of the most critical decisions. The biggest available panel I could find with a somewhat reasonable price was a 10.3” Waveshare panel that also shipped as a separate HDMI screen. Since the panel would always be a big expenditure having the comfort of knowing I could always fall back to just using the HDMI driver board in the monitor made it easier to swallow the cost. Even if I failed to create a meaningful driver for the panel I would at least be able to go ahead with the project.
As mentioned in the introduction article the panel was both available as a stand-alone product with a separate driver board, as well as in the HDMI monitor form-factor. I decided to go for the HDMI monitor and separate driver board combination even though the total was more expensive because of the decreased risk of a completely dead project out of the gate.
In recent years there have arrived some quite capable colour epaper panels. I would actually love to have colour for this project, especially for syntax highlighting, but the added cost, availability, and increased latency of displaying colour made me opt for a black and white panel. It does support 16 shades of grey though, which can be used for increased graphical fidelity.
Reviewing the HDMI monitor
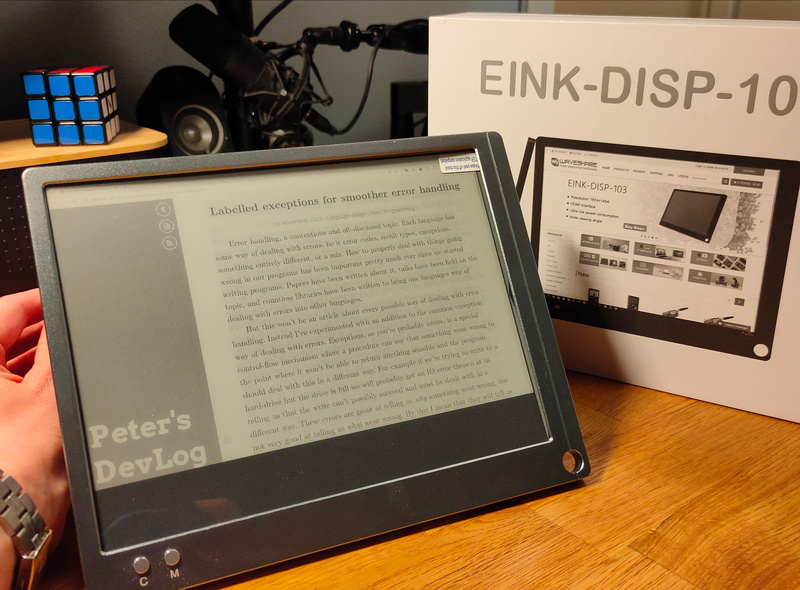
The monitor is a fairly simple affair, power it over micro-USB, hook it up through the included mini-HDMI cable and it shows up like any other monitor. It has a couple of different modes, trading update speed for graphical fidelity as you go through them with the “M” mode button on the front. The second button “C” is to clear and redraw the display, an important part of using an epaper monitor as it will get ghosting as you change what is displayed on it. On the side there is also a small up and down rocker which can be used to change contrast.

The monitor works pretty well on its own, but it does have a couple flaws that I anticipated which is why I wanted to go for the separate controller and custom driver solution. First and foremost is probably user interface. Having to physically tap the “clear” button gets old very quick, and constantly having to fiddle with modes and contrast depending on what you’re looking at isn’t great. Imagine coding something with documentation open in a browser. Maybe you want one mode for the documentation and another for the code, but with the manual switching you’re almost certainly not going to bother to switch as you tab back and forth between the two programs. It would be much better to have keyboard shortcuts that did this instead of screen-mounted buttons. And better yet would be to have the ability to set the mode on a per-program basis and clears to happen automatically as we switch between programs. This level of control is unfortunately not possible with the HDMI controller.
Another problem is how the panel converts from whatever the HDMI signal gives and what is displayed on the screen. Obviously it can’t display the full RGB signal that it is fed from the computer, so it needs to somehow turn this into a — in the case of the fastest modes — completely black and white image. This is done by first converting to greyscale, then converting the greyscale to black and white using some dithering technique. My next article in this series is going to be all about dithering, but let me just say that they chose poorly which algorithm to use here. Essentially they use some kind of error-diffusion, which means that the error resulting from turning a grey pixel black or white is transferred to the surrounding pixels that haven’t been processed yet. This results in very good graphical fidelity which is probably why it was chosen. But it also means that even the slightest change to the image, such as moving the cursor or typing a character, means that a lot of pixels in the image changes. When you take into account the slight ghosting that occurs on epaper screens this means that as you move the cursor the image will update and you are left with a large ghostly lightning effect emanating from where the change occurred. This is obviously not great, and the HDMI monitor has no way to switch the dithering algorithm used. What’s worse is that even static images have flickering pixels. Not quite sure what’s causing this, but it seems like the dithering algorithm can’t decide on which colour certain pixels should be and ends up flickering between two colours. This creates an effect like the screen has ants on it, which is quite straining to look at.
The last nail in the coffin for just going ahead and using the HDMI monitor is the processing overhead and therefore power consumption. One of the great things about epaper is that it doesn’t consume any power maintaining an image. This means that as long as you’re not updating anything the monitor should ideally consume no power. However with the HDMI monitor it has a constant draw of current with no perceptible difference when it is updating. Not knowing how everything is implemented I can only guess that this is because the HDMI interface has to receive, decode, convert, and display every frame of the image, even if the end result is an identical frame.
So all in all, the HDMI monitor works, but it’s not great for my purposes of creating a general purpose epaper laptop. It also means that a couple ideas crystallise about what a perfect implementation would look like. It would need some way for the user to select settings like contrast, levels of greyscale, dithering algorithm, etc. on at least a per-window basis, it should also allow the user to trigger clears, or even better have some way to determine when a clear should be done automatically. There should also be no updates happening as long as the underlying content is static. If I’m just reading a website I’d want the panel to just stay static, and maybe even for the rest of the machine to enter a low power state.
The alternative
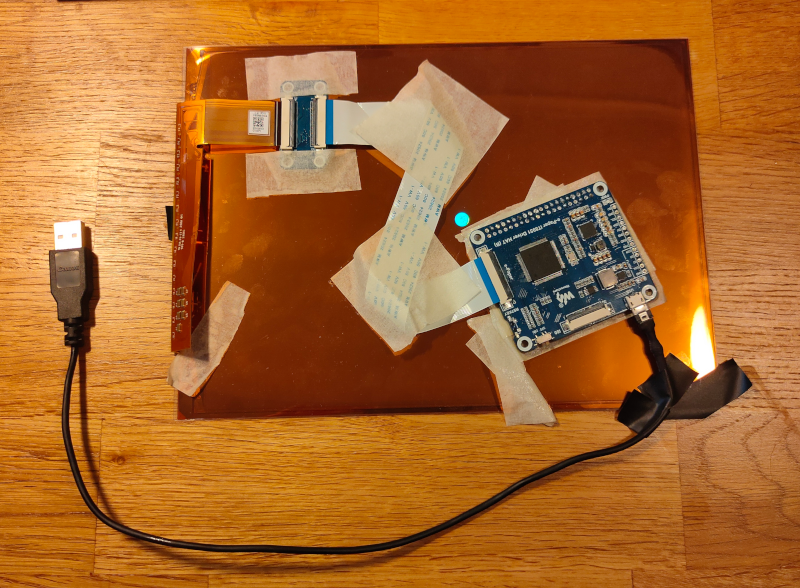
So the HDMI monitor is unfortunately left as a very poor choice for a full epaper laptop. This means that I need to implement a display controller myself somehow. To control the panel itself I got the it8951 board from Waveshare that they confirmed would work with this panel. The board is simple enough, it has a connector for the panel, the controller chip doing its dark magic, and various input options. According to Waveshare it supports I2C, SPI, USB, and something they call I80. In a future article I will go into detail about how I’ve implemented the controller and how I’ve integrated it with X11 to update only damaged regions and listen to X11 hints for figuring out how to draw the region of a window. I would also love to get my hands on the Modos board which I got to demo at FOSDEM and has crazy performance. Combining that performance with the X11 integration I think would bring a very interesting solution.
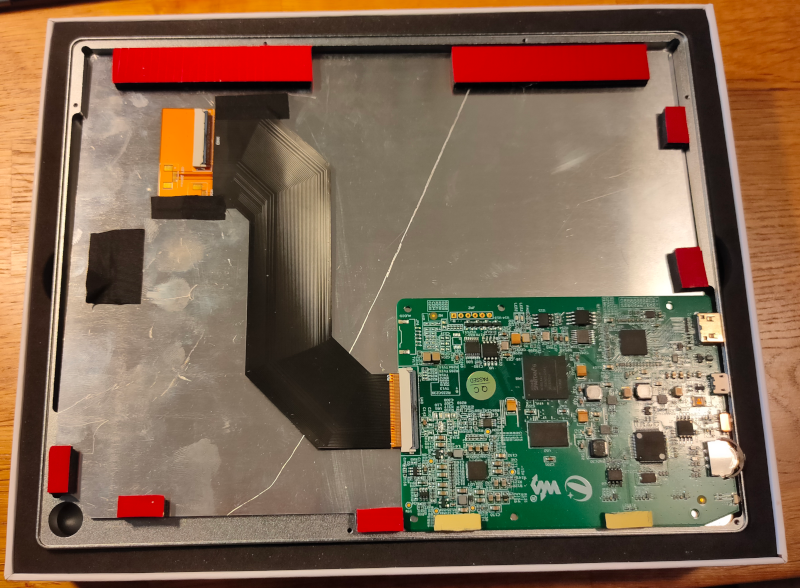
Getting the panel itself out of the monitor housing was pretty trivial, the housing is just held together by seven small screws on the back. Inside we find the HDMI controller board, a ribbon extension, and a metal back-plane which the panel is attached to with some double sided tape. Made not the best build-quality wise, but very DIY friendly!
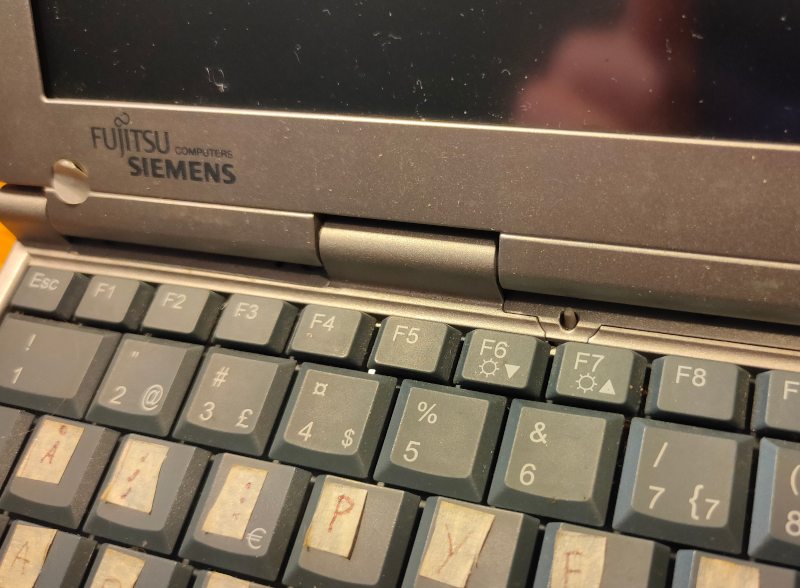
After getting the panel out it was time to figure out how to put it back into the laptop chassis. Fortunately this is an old machine and old hardware tends to be chunkier than new stuff. So the pass-through for the cable to power the original monitor panel and hold a curled up ribbon cable was more than big enough to simply pass a USB cable through.
After removing the header pins from the Waveshare it8651 board it was able to fit together with the panel inside the old monitor assembly (again, chunky old hardware). The USB cable needed a bit of modification to be thin enough, and after taking a page from Waveshares book I taped it up on the back of the panel and gave it a fit testing.
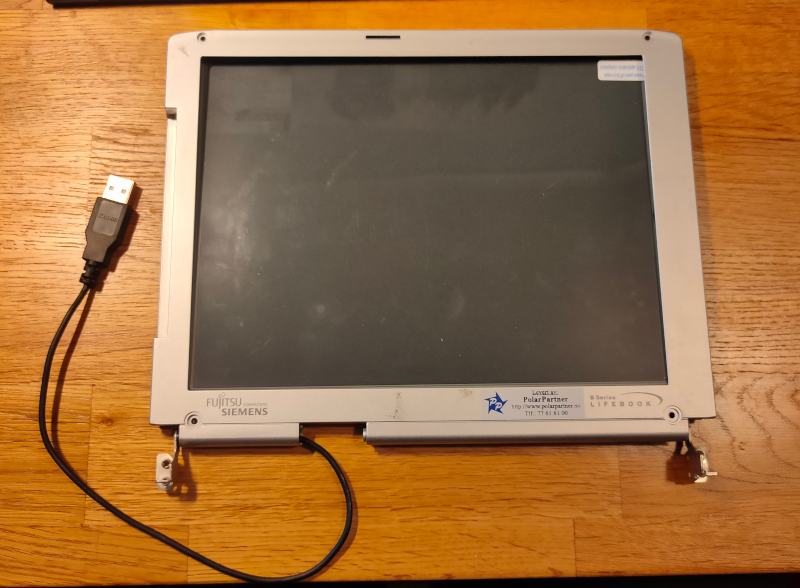
And just like that the panel fits into the monitor! Since the board is both powered and driven through the USB cable it’s the only thing that needs to go between the monitor part and the rest of the laptop. And the size and aspect ratio of the screen fits perfectly in the old bezel! I plan to 3D print or CNC a back-plane to hold everything nice and snug and mount it properly, but I haven’t had a 3D printer big enough or access to a CNC until very recently. Luckily I now do, thanks to a new local makerspace, so it’s on my list of things to try out soon.